If you want to grow some strawberries this year, but you don't have a lot of space in your garden, then give this DIY Strawberry Gutter a try - it's cheap to make too.
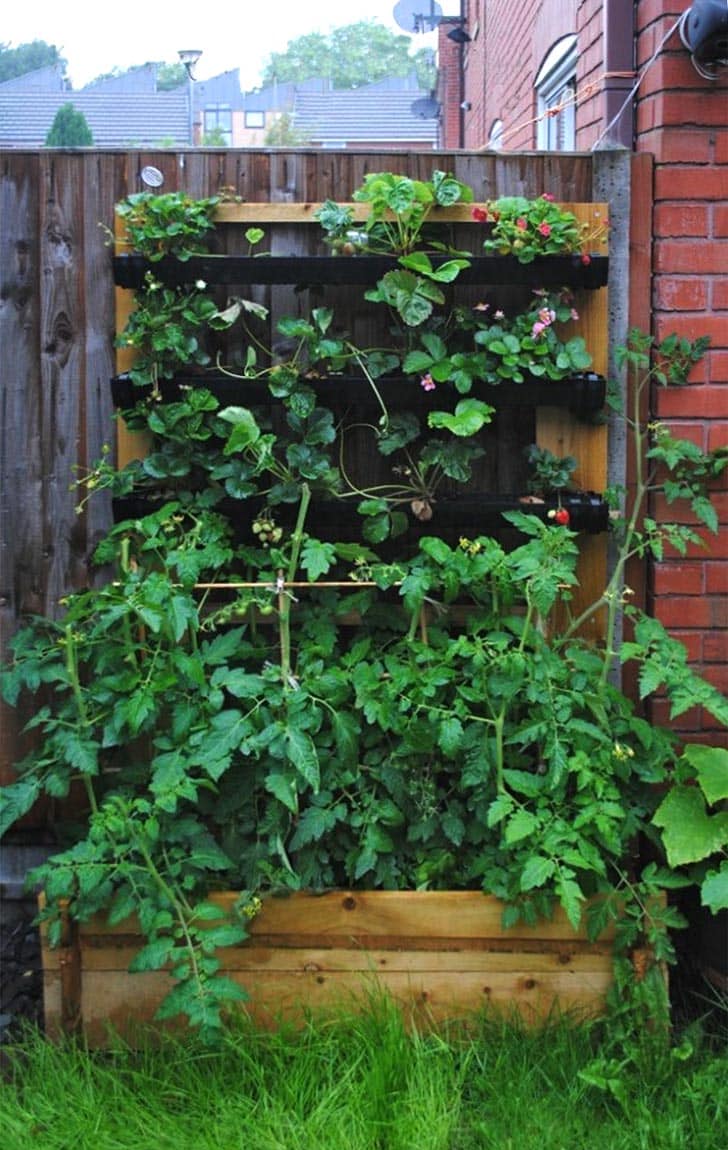
Nothing tastes more like summer than fresh, juicy strawberries, and with Wimbledon having just finished, this wonderful little fruit is always popular.
With over 28,000 kilos of strawberries eaten during Wimbledon fortnight alone, it’s no wonder people are always after them. Like most people that live in the city, we don't have a lot of garden space, so we choose to grow upwards.
Jump to:
Why should you make it?
- Homegrown fruit
- Simple to make, with only a few steps
- Really inexpensive to make
- Space saving
How to build strawberry gutter - step by step
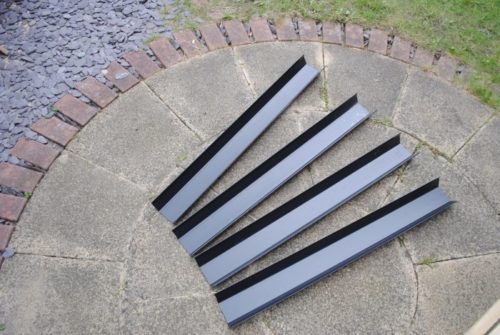
One: Measure your space and using a hacksaw cut the gutter to the lengths you require (mine are 1 metre/39 inches long each).
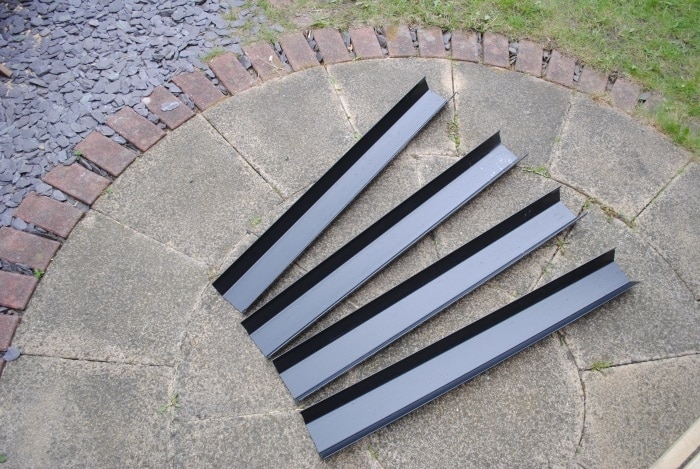
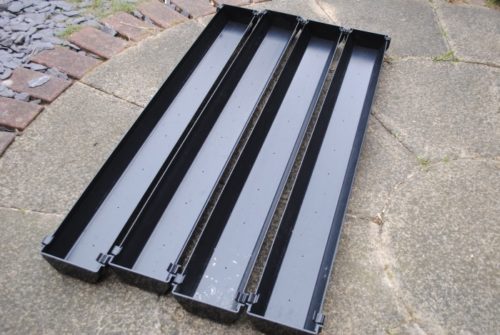
Two: Using a drill, make drainage holes in the base, spaced about 15cm/6 inches apart. Put the stop ends on and the gutter is ready.
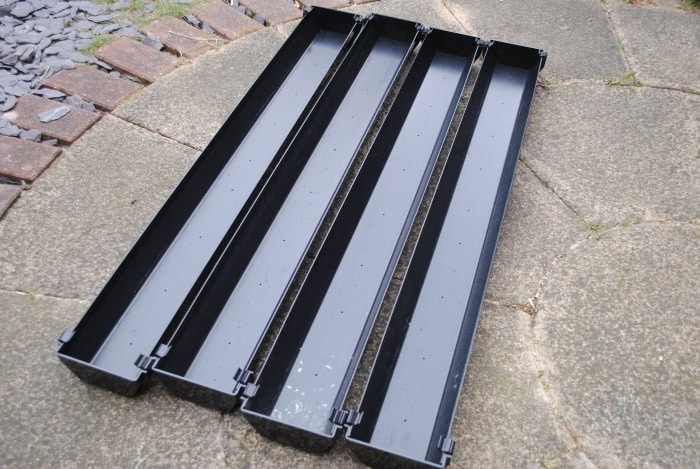
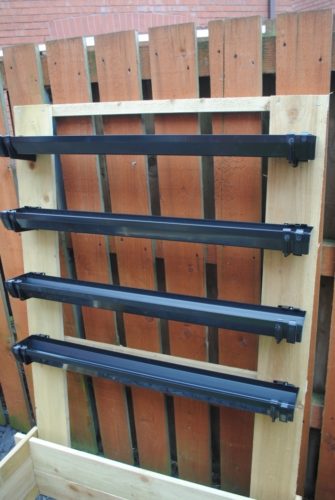
At this point, the brackets can be fixed to a vertical surface if you have a suitable one available and the gutter clipped into them.
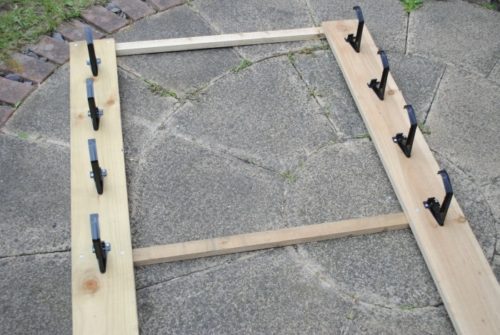
I constructed a simple frame from treated timber (it’s important the timber is treated as it will be resistant to the weather). This also makes the whole gutter system portable, should it need to be relocated.
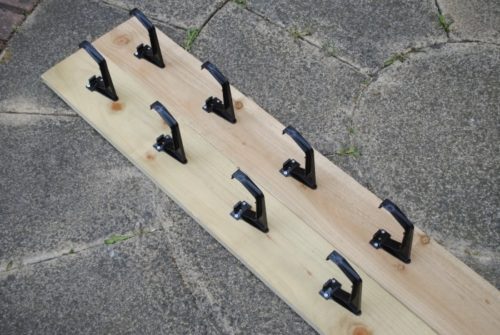
Three: For the frame, I used two lengths of 140x22mm/6x1” timber for the uprights and two lengths of 50x38mm/2x1.5” timber for the cross supports. I cut the uprights to 1500mm/59 inches each and the cross supports at 1100mm/43 inches each. For the uprights, measure where you want the brackets to be and screw them at equal distances apart. Do this for both uprights.
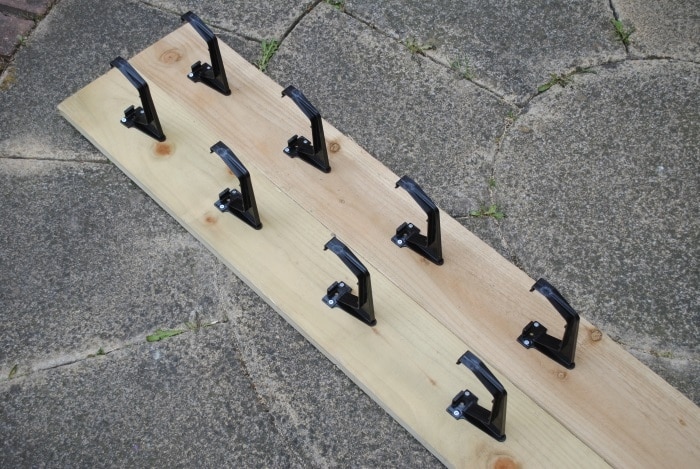
Four: Position the cross supports at the back of the uprights and screw into place to make the frame.
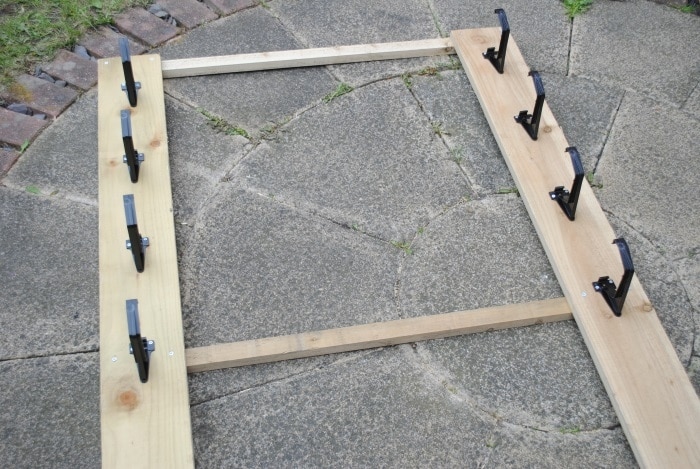
Five: Clip in the cutter lengths and the frame will be ready to be stood up. For extra support, I fixed the frame at the bottom of the uprights to a raised bed that we already had.
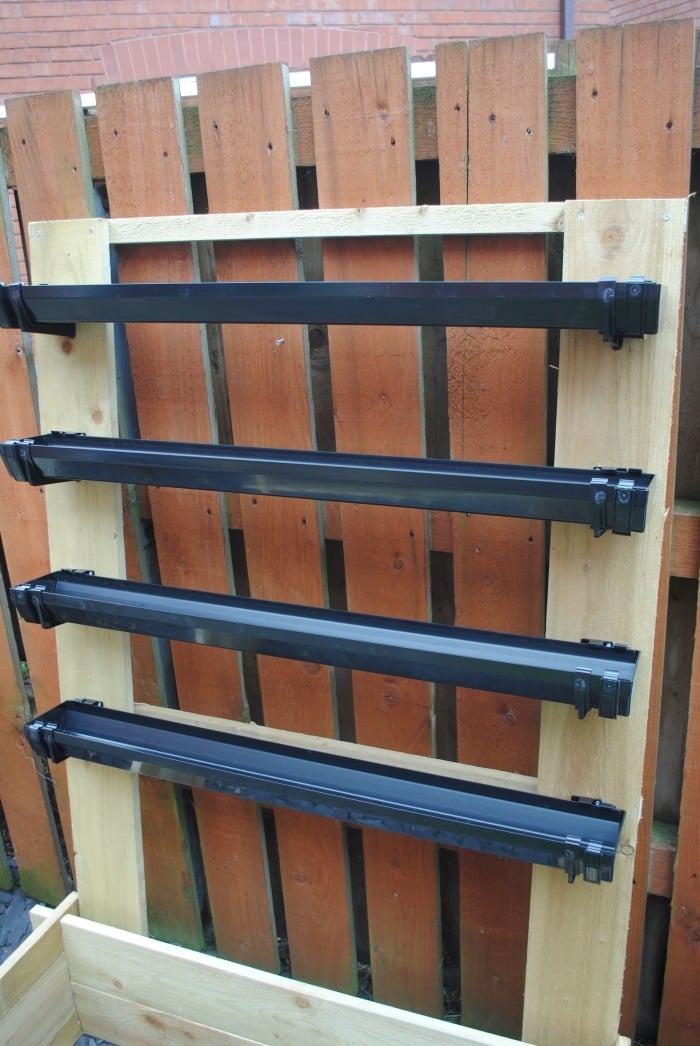
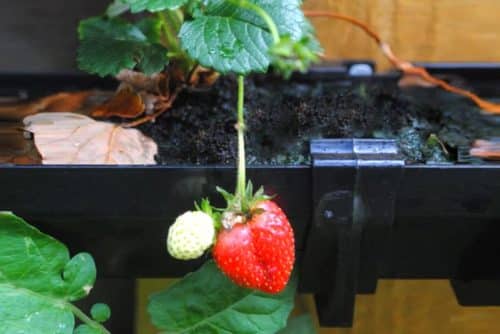
Six: The gutter can now finally be filled with compost (leave a small space below the rim for watering) and you can plant your strawberries. This type of growing gutter is also good for microgreens, pea shoots and herbs.
How to grow strawberries in a small space
Growing your own strawberries is easy - there are varieties that can be grown in sunny spots as well as shady areas. Make sure you research the type of strawberry you want to grow before planting, as a sun loving variety with not do well in a shady place.
Strawberry plants that are grown successfully can harvest lots of fruit, but the plants can also take up quite a bit of space. If you are limited for growing space, what can you do when you can’t grow plants out? You grow upwards!
What guttering to use
Plastic guttering can be bought from most builders’ merchants or large DIY stores for a fairly reasonable price. Don't forget that you will also need brackets and stop ends.
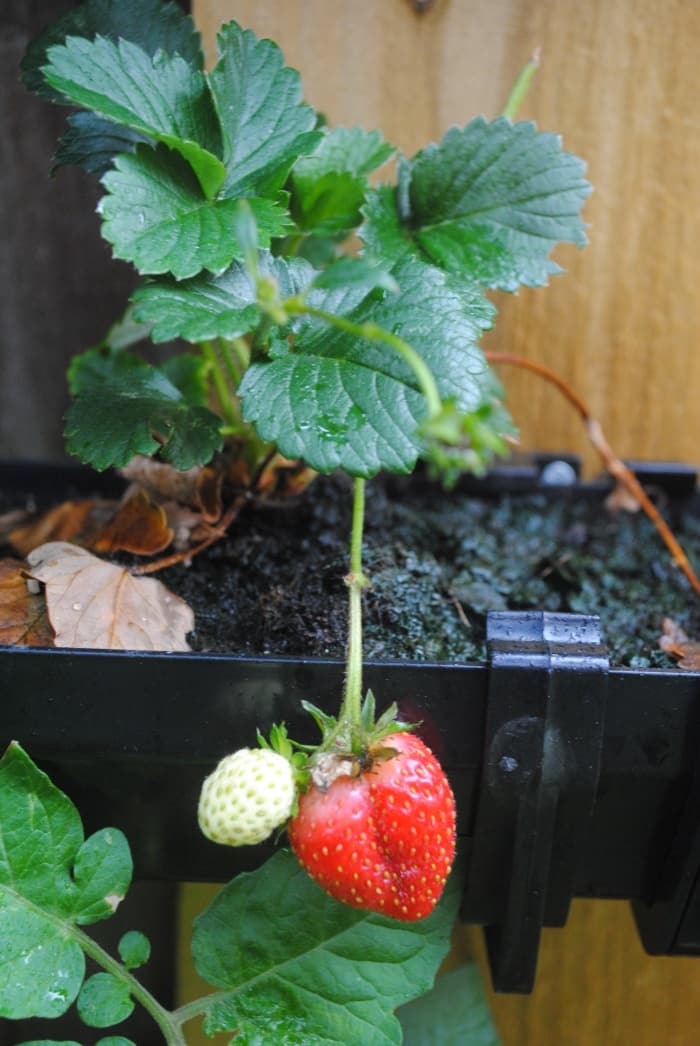
Choose a gutter that has a fairly deep profile, to maximise the amount of soil and space for the roots to grow.
Once you have selected the type of gutter you want (there are many designs and colours to choose from) it’s time to get building.
How big to build it
It completely depends on the amount of space you have and how much space you want to take up. But always plan your strawberry gutter out on paper before you start building.
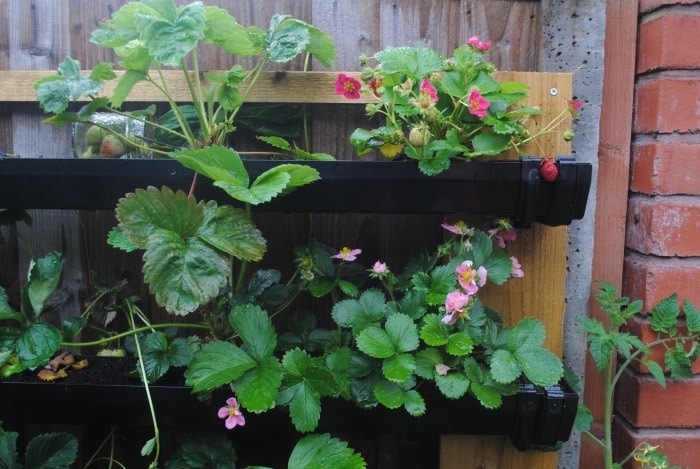
After we planted our strawberries, we decided to remove the bottom gutter as we were also growing tomatoes in the raised bed below and they are quite tall. The tomatoes grew really fast and started to take over a little bit, consider that if you are growing something under the strawberries.
Recipes using strawberries
If you’ve tried this strawberry guttering project then let us know how you got on in the comments below. We love hearing from you!
Tag us in your creations on Instagram @hungryhealthyhappy - we love sharing photos when people make our recipes. You can use the hashtag #hungryhealthyhappy too.
DIY Strawberry Gutter
Equipment
- Drill/driver or hand screwdriver
- Saw
- Tape measure
Materials
- 4 m Guttering any colour, deep profile
- 8 Gutter stop ends to suit
- 8 Gutter brackets to suit
- 3 m 140x22mm/6x1” timber treated, cut to two equal lengths
- 2.2 m 50x38mm/2x1.5” timber treated, cut to two equal lengths
- 24 50mm/2" exterior screws
Instructions
- Measure your space and using a hacksaw cut the gutter to the lengths you require (mine are 1 metre/39 inches long each).
- Using a drill, make drainage holes in the base, spaced about 15cm/6 inches apart. Put the stop ends on and the gutter is ready. At this point, the brackets can be fixed to a vertical surface if you have a suitable one available and the gutter clipped into them.
- For the frame, I used two lengths of 140x22mm/6x1” timber for the uprights and two lengths of 50x38mm/2x1.5” timber for the cross supports. I cut the uprights to 1500mm/59 inches each and the cross supports at 1100mm/43 inches each. For the uprights, measure where you want the brackets to be and screw them at equal distances apart. Do this for both uprights.
- Position the cross supports at the back of the uprights and screw into place to make the frame.
- Clip in the cutter lengths and the frame will be ready to be stood up. For extra support, I fixed the frame at the bottom of the uprights to a raised bed that we already had.
- The gutter can now be filled with compost (leave a small space below the rim for watering) and you can plant your strawberries. This type of growing gutter is also good for microgreens, pea shoots and herbs.
Notes
- Use a guttering with a deep profile.
- The frame is made from treated timber (it’s important the timber is treated as it will be resistant to the weather). This also makes the whole gutter system portable, should it need to be relocated.
- Follow the builders' rule: Measure twice, cut once.
- Don't forget stop-ends for your guttering or the soil/compost will fall out.
- You can stain or varnish the timber, but make sure it is completely dry before planting anything.




All That I'm Eating says
What a great idea! Keep those pesky slugs and snails off your strawberries!
Dave Martin says
Slugs and snails can still make their way up there though. I suggest getting some self adhesive copper tape and sticking it around the gutter - slugs and snails won't crawl over anything copper.
Claire says
What a great little set up - you have me inspired!
Dave Martin says
Really please to hear that
Diana says
Wow I love this! We planted some strawberries at my mum's garden but in regular pots and it was really hot where she lives this summer, and the sun burnt all of the plants! Will have to try again I guess and try and find another corner in the garden with more shadow!
Dave Martin says
I's suggest doing some research and find which strawberries work will in a sunny area.
Catherine says
What a great idea. I love this...having strawberries is so much fun and it really makes everything look so pretty. xo, Catherine
Dave Martin says
They are really nice to look at and they produce some really nice flowers (albeit short-lived!)
[email protected] says
What a clever idea. This makes me mad I live in a condo with no yard!
Dave Martin says
If you can use a window-box, they will grow in that
Michele @ Flavor Mosaic says
What a great idea. I need to show this to my husband and put him to work. ;-)
Dave Martin says
Hopefully, you can get a strawberry set up soon
Annie @ The Garlic Diaries says
This is the coolest thing ever!! The idea of having home grown strawberries in my back yard just makes me so happy :).
Dave Martin says
It's really nice to grow your own produce
David @ Spiced says
What a great idea, Dave! I love the vertical garden thing. The only problem for us with strawberries is the darned chipmunks eat 'em all while they're still green. We finally gave up on growing strawberries. And now we're fighting the rabbits for our lettuce and peas. (The rabbits are winning...) I'd love to set up a vertical garden in our yard though!
Dave Martin says
Fortunately we don't have a chipmunk problem here in the UK. We have lost lettuces though - maybe we have a rogue rabbit on the loose!
Gayle @ Pumpkin 'N Spice says
Such a fun tutorial, Dannii! I will have to remember this for next year when I have a garden. Love how you set this up! And I bet those strawberries are SO good!
Dave Martin says
Glad you liked it. The strawberries are coming through now and they are really good
Elizabeth says
How wonderful is this! Oh to live in an area where the wind didn't kill everything! Happy strawberry harvesting later on! :D
Dave Martin says
The good thing about this is that it's portable, so can be moved into less windy areas when required
Elizabeth says
haha, the thing is to find a less windy area! ;)
Emma @ Supper in the Suburbs says
How very very clever! It's way more common to see a guttering set up at pick your own farms these days rather than the plants straight in the ground so you've got to be on to a winner! Bet you're going to have a big glut of strawberries in years to come :D
Dave Martin says
Thanks. There are already lots of strawberries growing, so hopefully we'll have a really big crop
Helen @ Fuss Free Flavours says
Such a good idea, space saving and it makes it easier to harvest them. I had a holiday job strawberry picking and after the rain it was miserable crawling along picking.
Dave Martin says
It definitely makes it easier to pick them - and also to see their progress
Lubka Henry says
I love strawberries - they are so easy to grow. I must admit that your shelving is a brilliant piece of work!!
Dave Martin says
Thank you - I'm really please with the way it turned out.
Laura says
I love this project!! And it looks amazing, growing strawberries is so much fun and this is perfect for that
Laura x
Dave Martin says
It is fun to make and grow them in this way.
Steph K says
Omg, I have to make this. We just moved house and have a tiny garden, but I really want to try growing something. I am useless at building things, but my bf could do.
Dave Martin says
I think you could probably make this - it is very easy. It's ideal for a small space.