

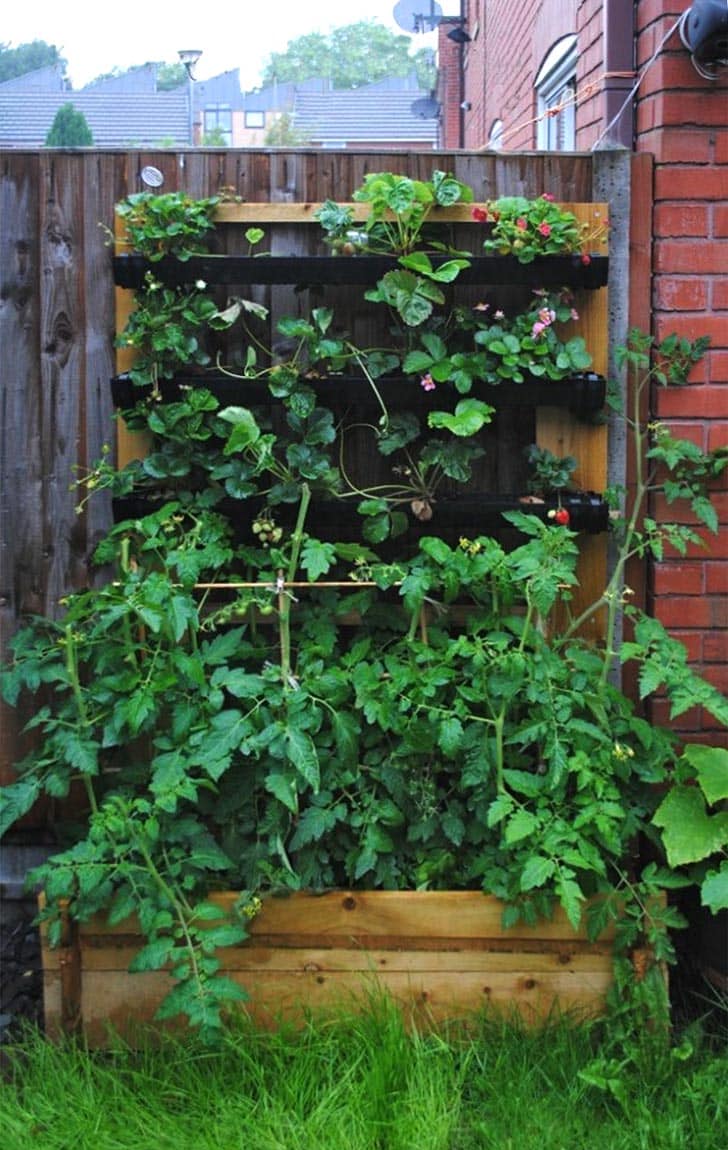
If you want to grow some strawberries this year, but you don't have a lot of space in your garden, then give this DIY Strawberry Gutter a try - it's cheap to make too.
Would you like to save this recipe?
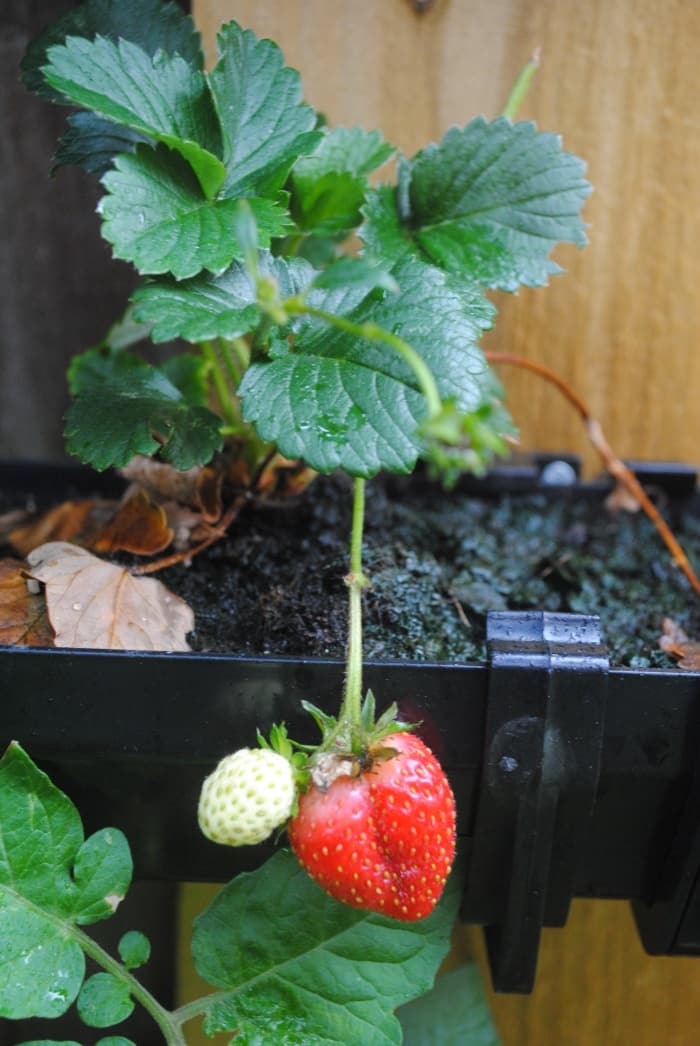
Nothing tastes more like summer than fresh, juicy strawberries, and with Wimbledon having just finished, this wonderful little fruit is always popular.
With over 28,000 kilos of strawberries eaten during Wimbledon fortnight alone, it's no wonder people are always after them. Like most people that live in the city, we don't have a lot of garden space, so we choose to grow upwards.
Jump to:
Why Should You Make It?
- Homegrown fruit
- Simple to make, with only a few steps
- Really inexpensive to make
- Space saving
How to Build Strawberry Gutter - Step by Step
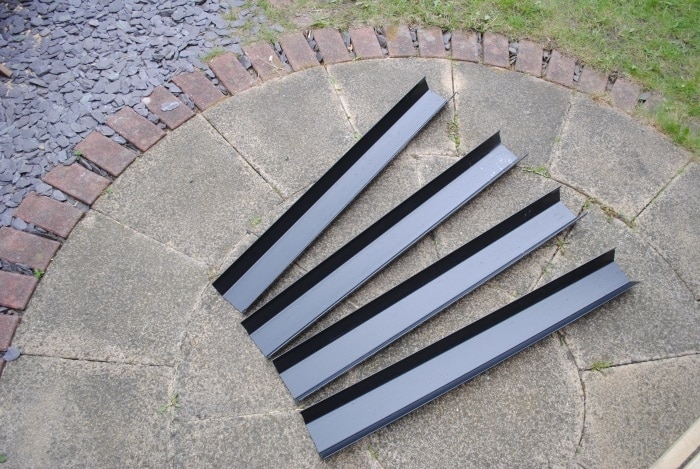
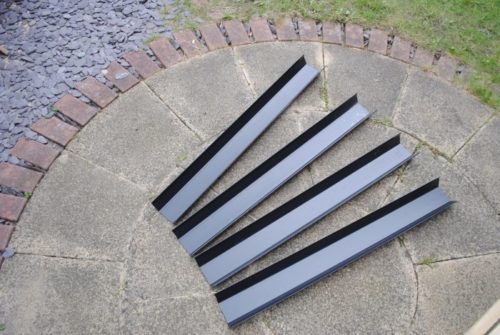
- Step 1: Measure your space and using a hacksaw cut the gutter to the lengths you require (mine are 1 metre/39 inches long each).
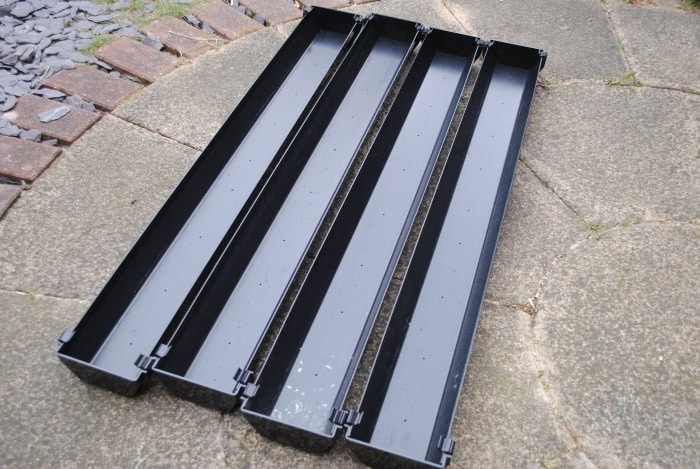
- Step 2: Using a drill, make drainage holes in the base, spaced about 15cm/6 inches apart. Put the stop ends on and the gutter is ready.
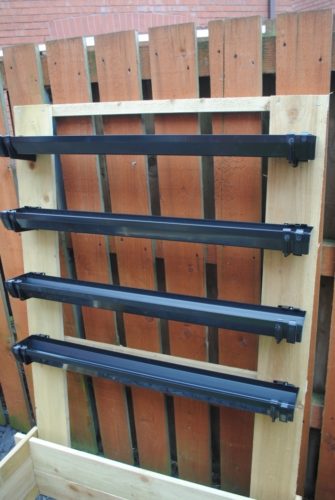
At this point, the brackets can be fixed to a vertical surface if you have a suitable one available and the gutter clipped into them.
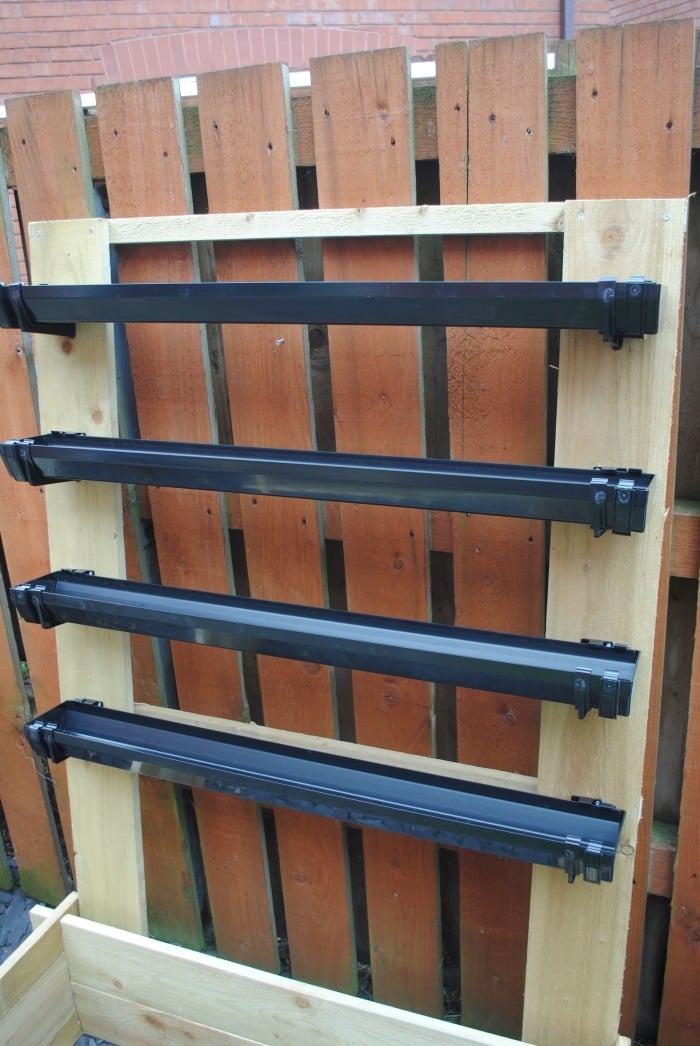
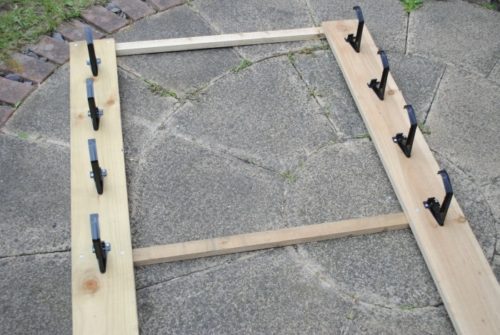
I constructed a simple frame from treated timber (it's important the timber is treated as it will be resistant to the weather). This also makes the whole gutter system portable, should it need to be relocated.
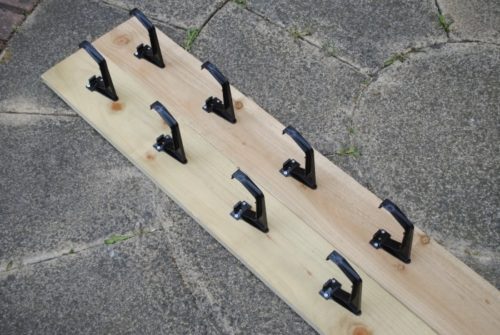
- Step 3: For the frame, I used two lengths of 140x22mm/6x1" timber for the uprights and two lengths of 50x38mm/2x1.5" timber for the cross supports. I cut the uprights to 1500mm/59 inches each and the cross supports at 1100mm/43 inches each. For the uprights, measure where you want the brackets to be and screw them at equal distances apart. Do this for both uprights.

- Step 4: Position the cross supports at the back of the uprights and screw into place to make the frame.

- Step 5: Clip in the cutter lengths and the frame will be ready to be stood up. For extra support, I fixed the frame at the bottom of the uprights to a raised bed that we already had.
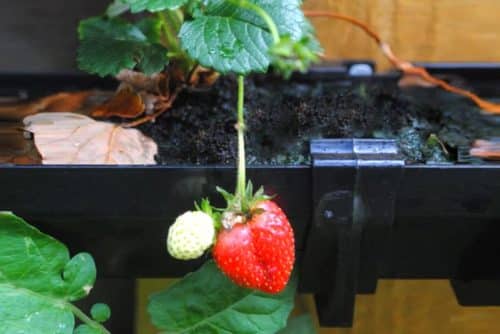
- Step 6: The gutter can now finally be filled with compost (leave a small space below the rim for watering) and you can plant your strawberries. This type of growing gutter is also good for microgreens, pea shoots and herbs.
How to Grow Strawberries in a Small Space
Growing your own strawberries is easy - there are varieties that can be grown in sunny spots as well as shady areas. Make sure you research the type of strawberry you want to grow before planting, as a sun loving variety with not do well in a shady place.
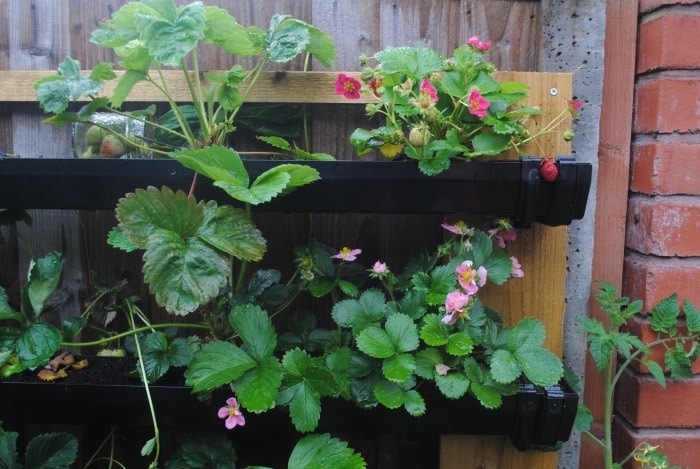
Strawberry plants that are grown successfully can harvest lots of fruit, but the plants can also take up quite a bit of space. If you are limited for growing space, what can you do when you can't grow plants out? You grow upwards!
What Guttering to Use
Plastic guttering can be bought from most builders' merchants or large DIY stores for a fairly reasonable price. Don't forget that you will also need brackets and stop ends.
Choose a gutter that has a fairly deep profile, to maximise the amount of soil and space for the roots to grow.
Once you have selected the type of gutter you want (there are many designs and colours to choose from) it's time to get building.
How Big to Build It
It completely depends on the amount of space you have and how much space you want to take up. But always plan your strawberry gutter out on paper before you start building.
After we planted our strawberries, we decided to remove the bottom gutter as we were also growing tomatoes in the raised bed below and they are quite tall. The tomatoes grew really fast and started to take over a little bit, consider that if you are growing something under the strawberries.
Extra Tips
- Use a guttering with a deep profile.
- Make sure the timber you use is treated to protect against weather.
- Follow the builders' rule: Measure twice, cut once.
- Don't forget stop-ends for your guttering or the soil/compost will fall out.
- You can stain or varnish the timber, but make sure it is completely dry before planting anything.
Recipes Using Strawberries


If you've tried this strawberry guttering project then let us know how you got on in the comments below.
Tag us in your creations on Instagram @hungryhealthyhappy - use the hashtag #hungryhealthyhappy too.

DIY Strawberry Gutter
Equipment
- Drill/driver or hand screwdriver
- Saw
- Tape measure
Materials
- 4 m of Guttering any colour, deep profile
- 8 Gutter stop ends to suit
- 8 Gutter brackets to suit
- 3 m of 140x22mm/6x1" timber treated, cut to two equal lengths
- 2.2 m of 50x38mm/2x1.5" timber treated, cut to two equal lengths
- 24 50mm/2" exterior screws
Instructions
- Measure your space and using a hacksaw cut the gutter to the lengths you require (mine are 1 metre/39 inches long each).

- Using a drill, make drainage holes in the base, spaced about 15cm/6 inches apart. Put the stop ends on and the gutter is ready. At this point, the brackets can be fixed to a vertical surface if you have a suitable one available and the gutter clipped into them.
- For the frame, I used two lengths of 140x22mm/6x1" timber for the uprights and two lengths of 50x38mm/2x1.5" timber for the cross supports. I cut the uprights to 1500mm/59 inches each and the cross supports at 1100mm/43 inches each. For the uprights, measure where you want the brackets to be and screw them at equal distances apart. Do this for both uprights.
- Position the cross supports at the back of the uprights and screw into place to make the frame.
- Clip in the cutter lengths and the frame will be ready to be stood up. For extra support, I fixed the frame at the bottom of the uprights to a raised bed that we already had.

- The gutter can now be filled with compost (leave a small space below the rim for watering) and you can plant your strawberries. This type of growing gutter is also good for microgreens, pea shoots and herbs.


Notes
- Use a guttering with a deep profile.
- The frame is made from treated timber (it's important the timber is treated as it will be resistant to the weather). This also makes the whole gutter system portable, should it need to be relocated.
- Follow the builders' rule: Measure twice, cut once.
- Don't forget stop-ends for your guttering or the soil/compost will fall out.
- You can stain or varnish the timber, but make sure it is completely dry before planting anything.


Anne says
Any suggestions for a way to catch the water beneath gutter am wanting to put on patio and don’t wNt it to spoil flooring.
Ken Smale says
You could put a second ‘ identical gutter a few Inch's below the one carrying the plants, but this on is not drilled and the drained water from the planted gutter above drips into this gutter. Seal off one end, and the other end just drips off into a watering can or bucket. When you mount this ‘water collecting gutter’, just drop one end by and inch or to to make sure it drains in the direction you wish. Hope this helps.
ian says
Tips from my experience - just put 2 x 3.6m 115mm QUAD gutters on my Sth bdry fence - gets full sun for longest period every day , to plant 8x JOY and 12x TEMPTATION strawberry plants ( winter here (NSW)).
1) install proper down pipes in each gutter - else you will have downed strawberry plants and very wet roots ( strawberrys don't like wet feet)
2) install some geofabric over the downpipe hole (will keep the citrus potting mix in)
3) dont water from above , I opted to use DRIPPERpipe layed behind the plants ontop of the citrus mix and lucerne straw mulch ( will stop leaves and berries getting wet )
4) watch the soil moisture content ( need not very damp ) , I achieve this via a tap timer set to 15min per day , an inline hose flowmeter and a nice 20mm globevalve ( I can throttle back water flow rate if needed using the gatevalve and by observing the volume of water delivered by the dripper pipe and testing soil dampness ( low teck = finger tip ).
My setup
https://i.postimg.cc/d1QR4WyY/IMG-1634.jpg
low ends of my 2 parallel 3.6m gutters https://i.postimg.cc/59SdHjxQ/IMG-1598.jpg
https://i.postimg.cc/ZKv87vCC/IMG-1636.jpg
I used Carinya 250 x 200 x 30 x 3.5mm Galvanised Heavy Duty Stayed Twisted Brackets to support my 2 gutters mounted on the hollow square section steel fence posts using techscrews.
Each 3.6m 115mm Quad gutter holds 25L of potting mixture .
The dripper pipe I used delivers 3L / hour per "hole" , spaced out every 30cm , I run the timer for 15min per day ==> 40% V/V .
My timer has a built in rain sensor, if it rains , the next programmed watering doesn't happen.
Flow control ( 20mm globe valve and HOSELINK Inline flowmeter attached to the 13mm polypipe feeder branch to the strawberries )
https://i.postimg.cc/sfcqj8cp/IMG-1600.jpg
ian says
PS - I opted NOT to use guttering Silastic to glue the endcaps onto my gutters .
BECAUSE - it will make it harder to remove old potting mix and plants later.
Instead, I opted to simply use a couple of short self drilling self tapping metal tech screws to fix the endcaps in place , when I want to replace potting mix , I can simply lift the gutters down ontop 2 work horses , unscrew an endcap and slide gutter contents straight out into a wheelbarrow - 1 minute and done .
Emmah says
i love your passion for gardening...
Cecilia Keinapel says
This is such a great post we have strawberries in our garden, nothing is better than fresh tasty fruit without all the chemicals you get when you buy them in store! xx
Dannii says
I totally agree. You can't beat home grown.
Helen Costello says
I love a DIY post! I'm so unpractical that the step by step pics are a great help. Homegrown strawberries have the best flavour.
Ana De- Jesus says
I was lucky enough to go to the Wimbledon this year and fresh strawberries are always a good idea. This is a great hack for guttering strawberries.
Pamela @ Brooklyn Farm Girl says
Aww good for you guys! This is awesome, what a great job! Keep enjoying those berries!
Dave Martin says
Thank you. Yes, we will enjoy them
Melanie @ Nutritious Eats says
This is awesome! We had strawberries at our old house in Washington, but we never knew what to do with them (other than eat them). ;)
Dave Martin says
Sometimes just eating them is the best thing to do with them.
Kari @ bite-sized thoughts says
How impressive - they look great!
Dave Martin says
Thanks - I'm pleased with the way they turned out
Candice Nikeia says
Wow! This is amazing! I wish I could have a strawberry garden at my place! So excited to see this grow more!
xoxo, Candice
Dave Martin says
Thank you. Strawberries can be grown in small pots, so even if you have no space, you can get growing!
Gloria @ Homemade & Yummy says
This looks interesting. I really would LOVE a herb garden...maybe this would work for it?
Dave Martin says
Yes, this would work really well for herbs, but you may want to try using a deeper gutter.
Jessica says
I once tried growing strawberries in the similar gutter you made, but unfortunately was not able to maintain the planting every right season. Maybe I need to build this gutters too by modifying my current one and let the growing starts again. Haha
Dave Martin says
Strawberries grow pretty quickly, so if you started again now, you should have some nice ones in no time at all
Julie Wright says
what an amazing idea! when i first saw your headline, my mind dig boggle slighty!
I hope that you get a wonderful crop from them, if this summer decides to behave :)
Dave Martin says
So far the crop has been pretty good, so hopefully we'll get lots more strawberries
Whitney Harries says
This looks so fun and not to mention tasty! I love strawberries but they are getting so expensive, so maybe I should invest in growing them! Thanks for the inspo!
Dave Martin says
Glad to have provided some inspiration. Strawberries can be expensive to buy, so growing them can save you a lot.